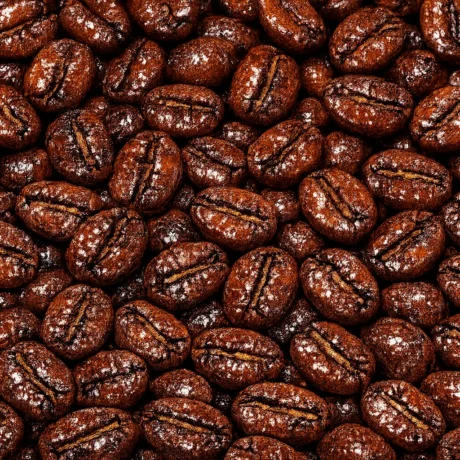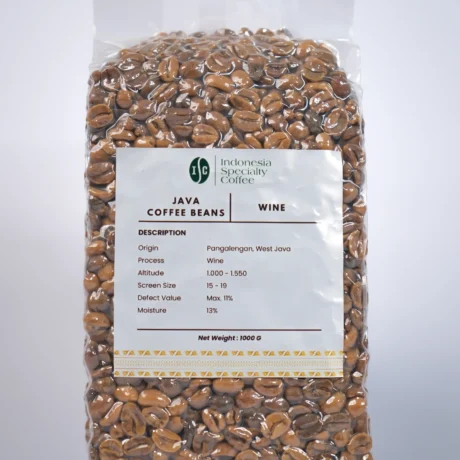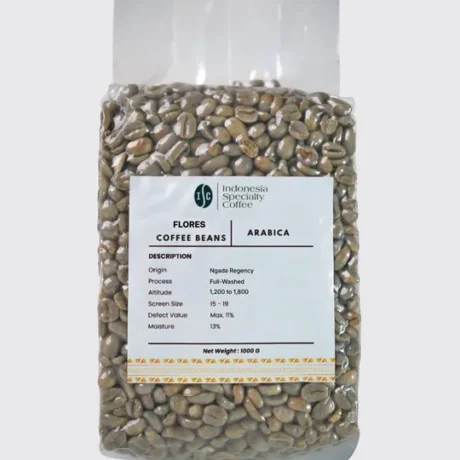

We cup every lot that leaves our warehouse in Medan, which means we also roast every lot first, on a small electric sample roaster, before it is ever shipped. After a few thousand of those roasts, one thing is clear: most beginner roasting problems are not roasting problems at all. They start with the green bean.
So here is the honest answer to coffee roasting for beginners. Learn to read the raw bean, memorize a baseline profile before you improvise, and understand what each stage of the roast is doing. The machine matters less than either of those. This guide walks through the bean, the numbers, the stages, the machines, and what to do after the roast, from the side of the trade that handles the coffee before you do.
Last updated: September 2026
Start With the Bean, Not the Roaster
Before you set a single temperature, three properties of the green bean decide how your roast behaves: density, moisture content, and size uniformity. Dense, high-grown beans need more heat and hold it differently. Wetter beans take longer to dry. Uneven beans roast unevenly, and no profile fixes that. Read these first, because coffee roasting for beginners is really green-bean reading with heat applied.
Density tracks with altitude. Coffee grown at 1,400 to 1,800 metres, like most Gayo Arabica from Aceh, is harder and denser than a low-grown lot. Denser beans absorb heat more slowly at the core, so they want a hotter, more patient roast. Squeeze a handful of green beans and drop them: the good stuff feels like gravel, not styrofoam.
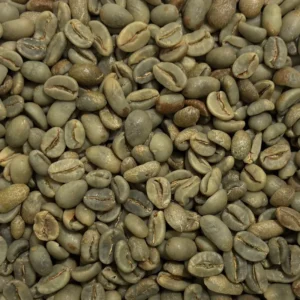
Moisture content is where a lot of home roasts go wrong before they begin. Fresh-crop green coffee usually sits around 10 to 12.5 percent moisture, and that is what you want in the hopper. Store it in a humid kitchen and it climbs. We see the extreme version of this at origin, because Sumatran coffee is wet-hulled: the parchment is stripped while the bean is still soft, at 35 to 40 percent moisture (wet-hulling, or Giling Basah), then finished on drying patios. That single fact is why Gayo and Mandheling beans arrive with an open, cracked, blue-green look and roast a little unevenly. It is a climate solution, not a defect, and knowing it changes how you read the bean in your hopper.
Size uniformity is the quiet one. A batch with mixed bean sizes will always give you mixed results, because small beans reach first crack before big ones. This is why exporters screen-size lots, and why a good sample looks boringly consistent. If your green coffee is all over the place, expect some beans underdeveloped and some scorched in the same roast.
By contrast, a clean, single-screen, correctly-dried lot forgives a lot of beginner mistakes. That is the whole argument for starting with quality green coffee: you are removing variables you cannot yet control.
The Numbers to Know Before You Experiment
Before you invent your own style, learn one baseline: a charge temperature (how hot the roaster is when the beans go in), a drop temperature (how hot the beans are when you end the roast), and a total roast time that lands in a normal range. For most small filter roasts that means a charge around 190 to 200°C, a drop near first crack, and a total time of roughly 8 to 12 minutes.
The charge temperature sets the momentum of the whole roast. Go in too hot and the outside scorches before the inside develops. Go in too cold and the roast stalls, baking flavour out of the bean. On a home drum or a sample roaster, most people land somewhere between 180 and 200°C for the drum, then let the bean temperature fall to a turning point before it climbs.
The drop temperature is your finish line, and it is a decision, not an accident. Pull the beans early, and you get a bright, acidic light roast; hold them longer and you move toward a darker, heavier cup. The trick for beginners is to end at the same point every time so you can actually compare batches.
Total roast time is the sanity check. A roast that finishes in four minutes is scorched on the outside and green in the middle; one that drags past fifteen tastes flat and papery. Learn what a normal, repeatable roast looks like on your machine first. You cannot experiment usefully until you have a baseline to experiment against. This is the single most common mistake we see: people chase exotic profiles before they can hit the same roast twice.
The Stages of a Roast, Start to Finish
Every coffee roast moves through the same stages in the same order: drying, yellowing, the Maillard reaction, caramelization, first crack, development, and, if you go dark enough, second crack. Each is a distinct chemical event, and each leaves its mark on the cup. The temperatures below are typical thresholds; your exact numbers will shift with the machine and batch.
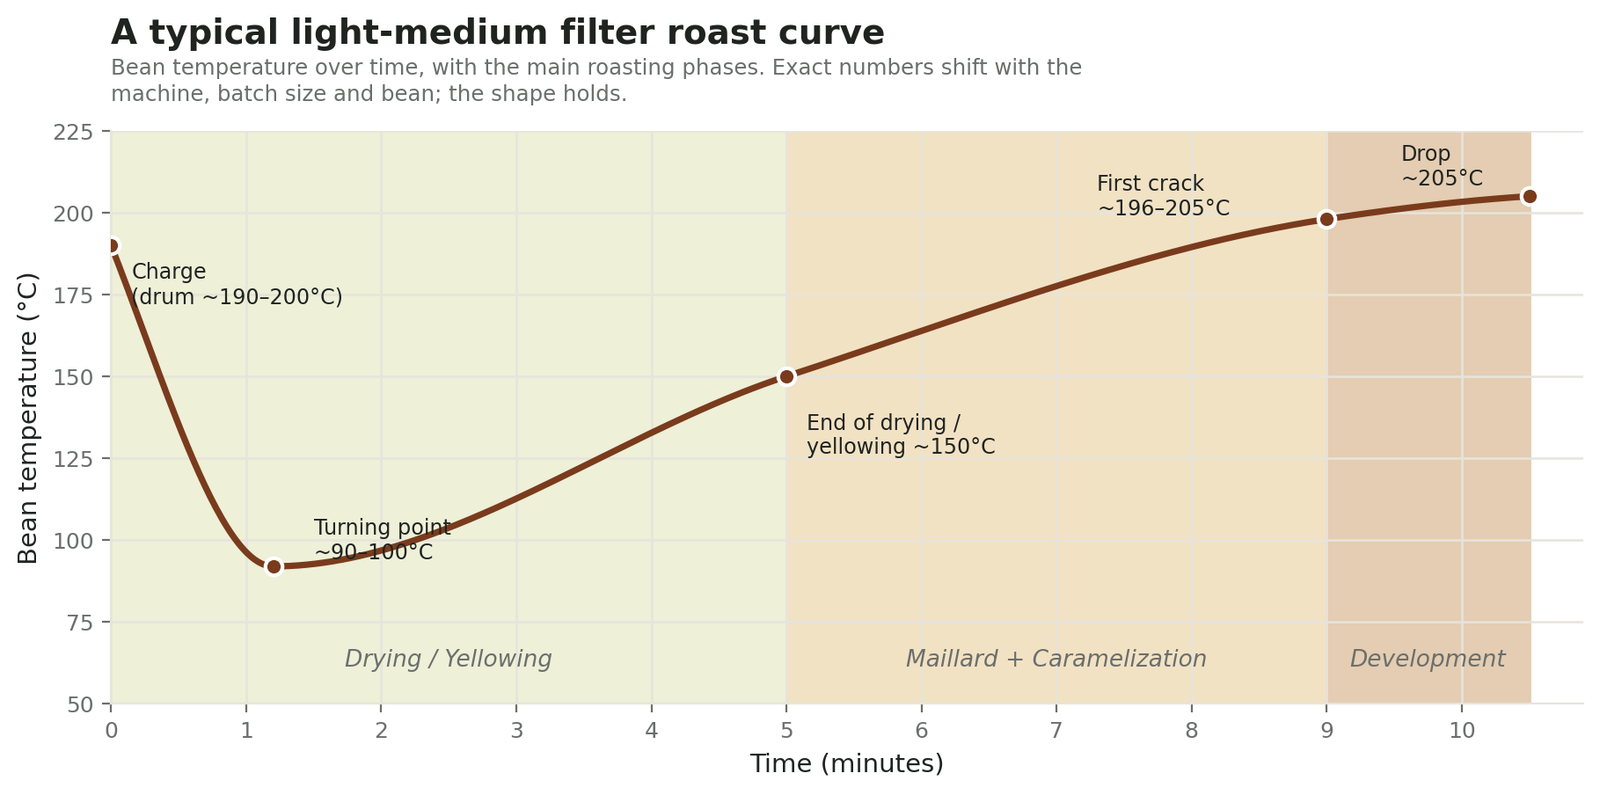
Drying and yellowing come first and take up roughly the front half of the roast. The bean sheds most of its water, shifts from green to yellow, and smells like hay or bread. Nothing tasty is forming yet; you are just driving off moisture. Rush this and the rest of the roast never recovers.
The Maillard reaction is where flavour is born. Starting around 150°C, sugars and amino acids react to build hundreds of aroma and flavour compounds and turn the bean brown. This is the same browning that makes toast and seared meat taste good. The longer and more evenly a bean spends here, the more body and complexity you build, which is why roasters obsess over this phase.
Caramelization overlaps and follows: the bean’s sugars break down under heat, deepening colour and building sweetness and those roasty, nutty notes. Push it too far and sweetness turns to bitterness and ash.
First crack is the milestone you listen for. Around 196 to 205°C the bean audibly cracks, like faint popcorn, as steam and carbon dioxide force their way out and the bean expands. First crack marks the entry to drinkable light-roast territory.
Development time is everything between first crack and the moment you drop the beans. Short development gives you bright, sour, grassy notes; longer development rounds the cup out. A common industry rule of thumb is a development time ratio of about 15 to 25 percent of the total roast, though plenty of good roasters argue about it.
Second crack, near 220 to 230°C, is a sharper, snappier sound and the doorway to dark roasts. Past it, the bean’s own oils surface and origin character gives way to roast character.
Here are the thresholds in one place:
| Stage | Typical bean temperature | What is happening |
|---|---|---|
| Drying / yellowing | up to ~150°C | Moisture leaves; bean turns green to yellow |
| Maillard reaction | ~150-190°C | Sugars + amino acids brown; flavour compounds form |
| Caramelization | ~170-205°C | Sugars break down; sweetness and colour deepen |
| First crack | ~196-205°C | Audible crack; light-roast territory begins |
| Development | first crack to drop | Final flavour balance is set |
| Second crack | ~220-230°C | Dark-roast territory; bean oils surface |
Roast Levels: Light, Medium, Dark
Roast level is decided by when you drop the beans, and it trades origin flavour for roast flavour as you go darker. Light roasts end at or just after first crack and keep the most acidity and origin character. Medium roasts sit between the cracks, balanced and sweet. Dark roasts approach or pass second crack, heavier and more bittersweet, with the bean’s own oils on the surface.
For a bean like Gayo, this choice matters. Light roasting keeps its citrus brightness and herbal top notes; a medium roast leans into the dark chocolate, cedar, and brown sugar it is known for; a dark roast pushes it toward bittersweet and smoky, burying the origin under roast. None of these is wrong. They are different answers to the question of what you want in the cup.
| Roast level | Drop point | Cup character |
|---|---|---|
| Light | at / just after first crack | Bright, acidic, most origin character |
| Medium | between first and second crack | Balanced, sweet, rounded body |
| Dark | at / past second crack | Heavy, bittersweet, roast-forward, oily surface |
If you are unsure where to start, roast to a medium light level. It is the most forgiving place to taste whether your green coffee and your technique are any good.
Gas vs Electric vs Wood-Fired Roasters
The three common heat sources are gas, electric, and wood, and they differ in control, cleanliness, and the flavour fingerprint they leave. Gas gives fast, responsive heat and is the production standard. Electric gives steady, precise, neutral heat and dominates small sample roasters. Wood-fired roasting is traditional and can add a smoky character, but it is the hardest to control.
Gas roasters heat mainly by convection and respond the instant you adjust the flame, which is why most commercial roasteries run gas. The trade-off is that combustion is less consistent batch to batch, and the beans come out carrying a bit more of the gases that roasting produces.
Electric roasters heat cleanly and hold a set point closely. That precision, and the absence of a live flame, is exactly why sample roasters are almost always electric. When we roast a lot to score it on the cupping table, we want to taste the bean, not the machine. A neutral, repeatable electric roast lets us judge the coffee’s true character and compare one lot against another on equal terms. Wet-hulled Sumatra already gives us enough variables; the roaster should not add more.
Wood-fired roasters are the oldest method and still used for certain traditional and boutique roasts. Real skill can produce a distinctive, gently smoky cup. Without that skill, you get uneven, ashy results, because wood heat is hard to hold steady. It is not a beginner’s tool.
| Heat source | Control | Consistency | Flavour footprint | Typical use |
|---|---|---|---|---|
| Gas | Fast, responsive | Moderate | Slightly more roast gases | Production roasting |
| Electric | Precise, steady | High | Clean, neutral | Sample roasting, home roasters |
| Wood-fired | Difficult | Low | Can add smoky notes | Traditional / specialty batches |
After the Roast: Sorting, Degassing and Resting
Roasting does not end at the drop. You still need to sort out defects, then let the coffee degas and rest before you brew it. Skipping these steps is why a technically fine roast can still brew badly. Sorting removes beans that will never taste right; resting lets the coffee release the carbon dioxide that roasting locked inside.
Sorting after roasting is about pulling defects your eye can now see. The two worth knowing:
- Quakers (also called crackers): pale, under-developed beans that stay stubbornly light while the rest of the batch browns. They come from unripe or underdeveloped cherries and taste papery, peanutty, and flat. They only reveal themselves after roasting, which is why post-roast sorting exists.
- Floaters: beans that are too light for their size, often because of damage, insect bite, or poor drying. At origin we float lots in water to pull these; after roasting, they are usually the odd, misshapen, off-colour beans you can pick out by hand.
Pull them out. A handful of quakers can dull an otherwise good batch.
Degassing is the release of carbon dioxide (CO₂) that roasting created inside the bean. Roasting traps a large amount of gas in the bean’s structure, and freshly roasted coffee slowly lets it go over days. This matters because CO₂ interferes with brewing: too much of it makes espresso gush and bloom wildly, and pushes water away from the grounds so extraction turns thin and sour.
Roughly 40 percent of that CO₂ escapes in the first 24 hours, then the release tapers off over the following days. That is why coffee needs resting. As a rough guide, washed coffees settle in around 7 to 8 days after roasting; naturals and heavier processes can take about two weeks. Espresso, which is sensitive to gas, generally wants a longer rest than filter.
There is a machine angle here too. Because gas roasting tends to leave the bean carrying a little more of these roasting gases, that coffee benefits from a clear rest before you judge it. An electric sample roast runs cleaner, so at the warehouse we can move from roast to cupping table sooner and trust what we taste. For your own roasting, the rule is simple: do not brew the same day you roast. Let it breathe.
| Brew method | Typical rest after roast | Why |
|---|---|---|
| Espresso | ~10-14 days | Most sensitive to CO₂; gassy shots channel and sour |
| Filter / pour-over | ~4-8 days | Some gas helps aroma; too much thins extraction |
| Washed coffees | ~7-8 days | Degas faster |
| Naturals / heavy process | ~14 days | Hold gas longer, need more rest |
The Honest Trade-Off: A Sample Roast Is Not a Recipe
Here is the part nobody selling roasters will tell you. The clean, neutral, repeatable roast you dial in on a small electric machine will not transfer one-to-one to a gas production drum. A profile that sings on 100 grams in an electric sample roaster can fall apart at 12 kilograms on gas, because batch size, airflow, and heat transfer all change.
That is not a flaw in sample roasting; it is the point. A sample roast is a measurement, taken on the most neutral machine we have, to judge the green coffee honestly. It tells us what the bean is capable of. It does not hand us a finished production recipe. When you scale up or switch machines, you re-develop the profile from scratch, using the sample only as a target for the cup, not as a set of numbers to copy.
For a beginner, the useful version of this truth is smaller: your roaster is a variable, not a constant. Learn your machine deeply before you trust any profile you read online. Numbers from someone else’s roaster are a starting hypothesis, never a recipe.
What This Means If You’re Just Starting Out
If you are just starting out, work in this order and you will improve faster than most:
- Buy good, consistent green coffee. Even sizing, correct moisture, a clear origin and process. You cannot roast your way out of a bad lot.
- Nail one baseline roast before you experiment. Same charge temp, same drop point, same time. Hit it three times before you change anything.
- Learn the stages by sound and smell, not just by thermometer: the hay smell of drying, the browning of Maillard, the pop of first crack.
- Start at medium-light. It is the most honest window for tasting your progress.
- Sort out quakers and floaters every batch.
- Rest the coffee. Give it at least a few days, longer for espresso, before you judge it.
- Change one variable at a time, and write it down. Roasting improves through comparison, not intuition.
Do those seven things and you are ahead of most home roasters, who buy an expensive machine and skip straight to chasing profiles.
Frequently Asked Questions
What is the best roast level to learn for beginners?
A medium-light roast, dropped shortly after first crack, is the most forgiving starting point. It keeps enough of the bean’s origin character to tell you whether your green coffee and technique are good, without the risk of scorching that comes with pushing into dark-roast territory.
How long does it take to roast coffee beans?
Most small filter roasts take about 8 to 12 minutes from charge to drop. A roast that finishes under four minutes usually scorches the outside while the inside stays underdeveloped; one that drags past fifteen minutes tends to taste flat and papery. Learn a repeatable time on your own machine first.
Why do you need to rest coffee after roasting?
Roasting traps carbon dioxide inside the bean, and that gas interferes with brewing until it escapes. About 40 percent of it releases in the first 24 hours. Resting the coffee, roughly a week for filter and up to two for espresso, lets it degas so extraction is even and the cup tastes balanced.
What are quakers in roasted coffee?
Quakers, also called crackers, are pale, under-developed beans that stay light while the rest of the batch browns. They come from unripe or poorly developed cherries and taste papery and flat. They only show up after roasting, which is why sorting them out by colour is a post-roast step.
Why are sample roasters usually electric?
Sample roasters are electric because electric heat is clean, precise, and neutral. When roasting a lot to score its quality, the goal is to taste the bean, not the machine. Electric roasting adds no flame character and holds a steady, repeatable profile, so different lots can be compared on equal terms.
Do I need an expensive machine to start roasting?
No. Green-bean quality, a repeatable baseline profile, and understanding the roast stages matter far more than the machine at the start. Beginners get better results from a modest, well-understood roaster and good green coffee than from an expensive machine used without a consistent baseline.
Where to Start: Green Coffee Worth Practising On
Whatever supplier you use, ask for the current crop year, the full two-step process description, and a recent cupping score before you commit to a bag. For learning, pick a bean with clear, consistent character so you can actually hear your roast improving.
Aceh Gayo is a good teacher, and it comes in a spread of processes that each roast a little differently: full-washed (clean and bright), semi-washed (the classic wet-hulled Sumatra body), honey (rounder, sweeter), natural (fruit-forward and heavier to degas), and wine (an extended fermentation with bold, boozy fruit). Roasting the same origin across processes teaches you more than five different origins ever will. If you want to start there, Indonesia Specialty Coffee ships 1 kg cupping samples of the Gayo lots we export from Aceh: request a sample or see the current pricelist.